Option A (via a WordPress plugin)
The easiest way to implement our widget is using one of the many WordPress plugins, that are built to insert ads.
Simply copy the following code into the settings of the plugin (you only need to replace the data-widget-id value with the proper ID provided by your Account Manager):
<div class="OUTBRAIN" data-widget-id="WIDGET_ID"></div>
<script type="text/javascript" async src="https://widgets.outbrain.com/outbrain.js"></script>
Thereafter you can use that widget via “Appearance” > “Widgets” in the WordPress Administration Screens (https://wordpress.org/support/article/wordpress-widgets/).
Important note: If you try to place the above code as “Custom HTML” in a regular WordPress widget without the help of a plugin, you’re still going to rely on a plugin to override WordPress’ restrictions on using PHP in posts (https://wordpress.org/support/article/wordpress-widgets/#adding-code-to-the-text-widget).
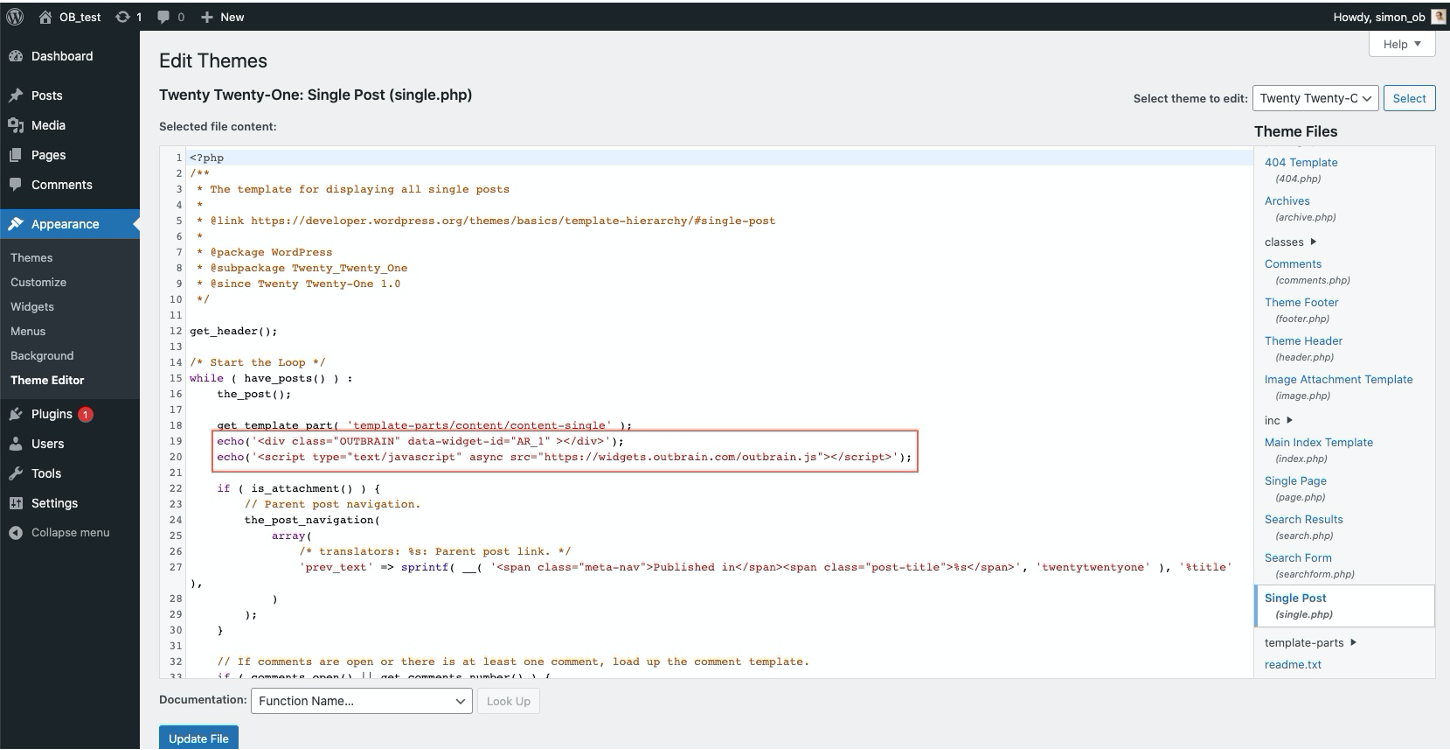
Option B (via adjusting the post content code)
- Log into your WordPress site with administrator access (append /wp-admin/ to the site URL).
- In the WordPress dashboard navigate to the “Appearance” tab.
- Go to the “Theme Editor” tab.
- Look for the file “Single Post (single.php)”*.
-
Add the following code:
echo('<div class="OUTBRAIN" data-widget-id="Widget_ID"></div>'); echo('<script type="text/javascript" async src="https://widgets.outbrain.com/outbrain.js"></script>'); -
Click on the “Update File” icon. That should make the widget active on the page
*it depends on your setup preference if you place the code in single.php or page.php
See screenshot below:
Child Themes
You might also want to take a quick look at the short explanation of what a “Child Theme” is and why it’s helpful for better control over your content: https://developer.wordpress.org/themes/advanced-topics/child-themes/